

Inspection technology for maximum precision
The material handling is realized by our in-house machine construction in coordination with the requirements of the inspection technology.
Our proprietary software solution makes it possible to solve the inspection task in a customer-specific manner and includes the option of defect classification and statistical evaluation.

EMS sensors
This measuring principle for checking the electromagnetic signature is used worldwide in vending machines in which coins are used for payment. Inductive testing of the coin or coin blank provides information about the material composition and/or coating of the coin/blank. The measured values of the individual object are compared with a material database and assessed as good or bad depending on the deviation from the references or the deviation defined as acceptable.


Eddy current measurement
Eddy current measurement is a non-destructive method for testing metallic surfaces. With the help of high-frequency electromagnetic interactions, different material hardnesses can be detected and analyzed both manually and automatically. This method plays a decisive role in quality assurance, as it measures the mechanical resistance of a material against the penetration of another body.


2D camera technology for edge inspection
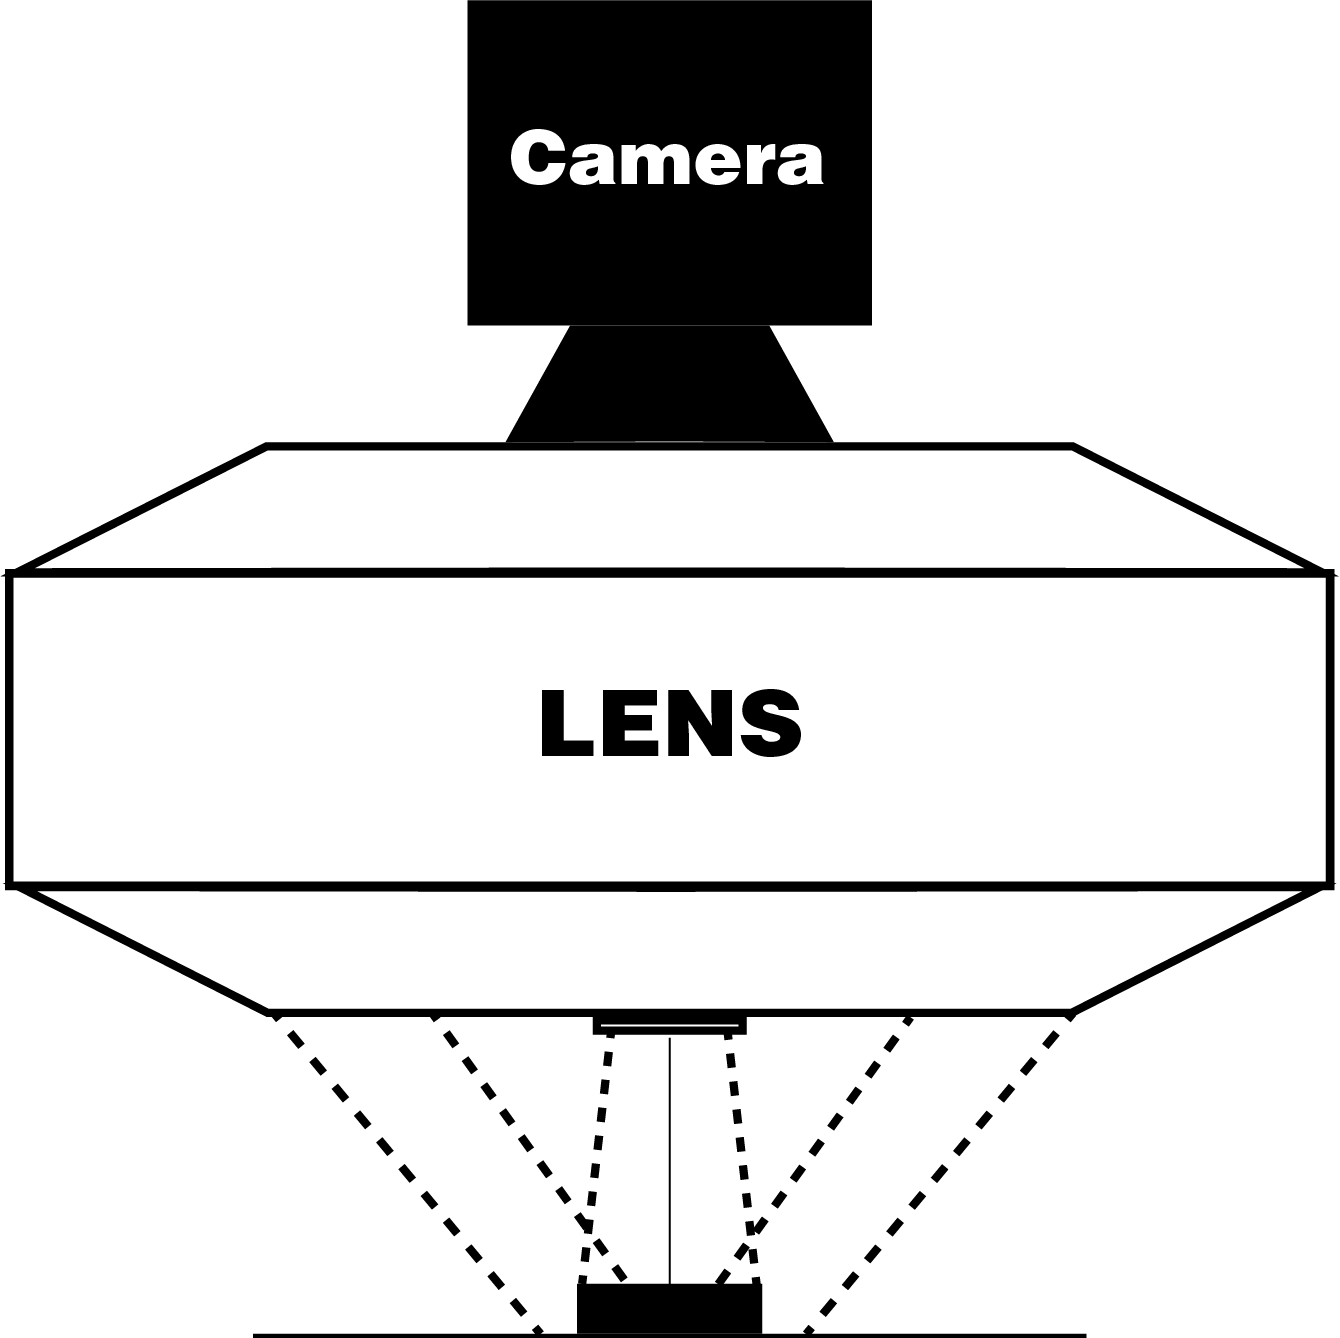
For geometric reasons, 2D and 3D camera technology only captures the top and bottom of an object, but not the edges. A special 2D camera in combination with a ring light and a catadioptric lens is used to inspect the edge surfaces.
The following features can be checked using 2D camera technology for edge inspection:


3D camera technology
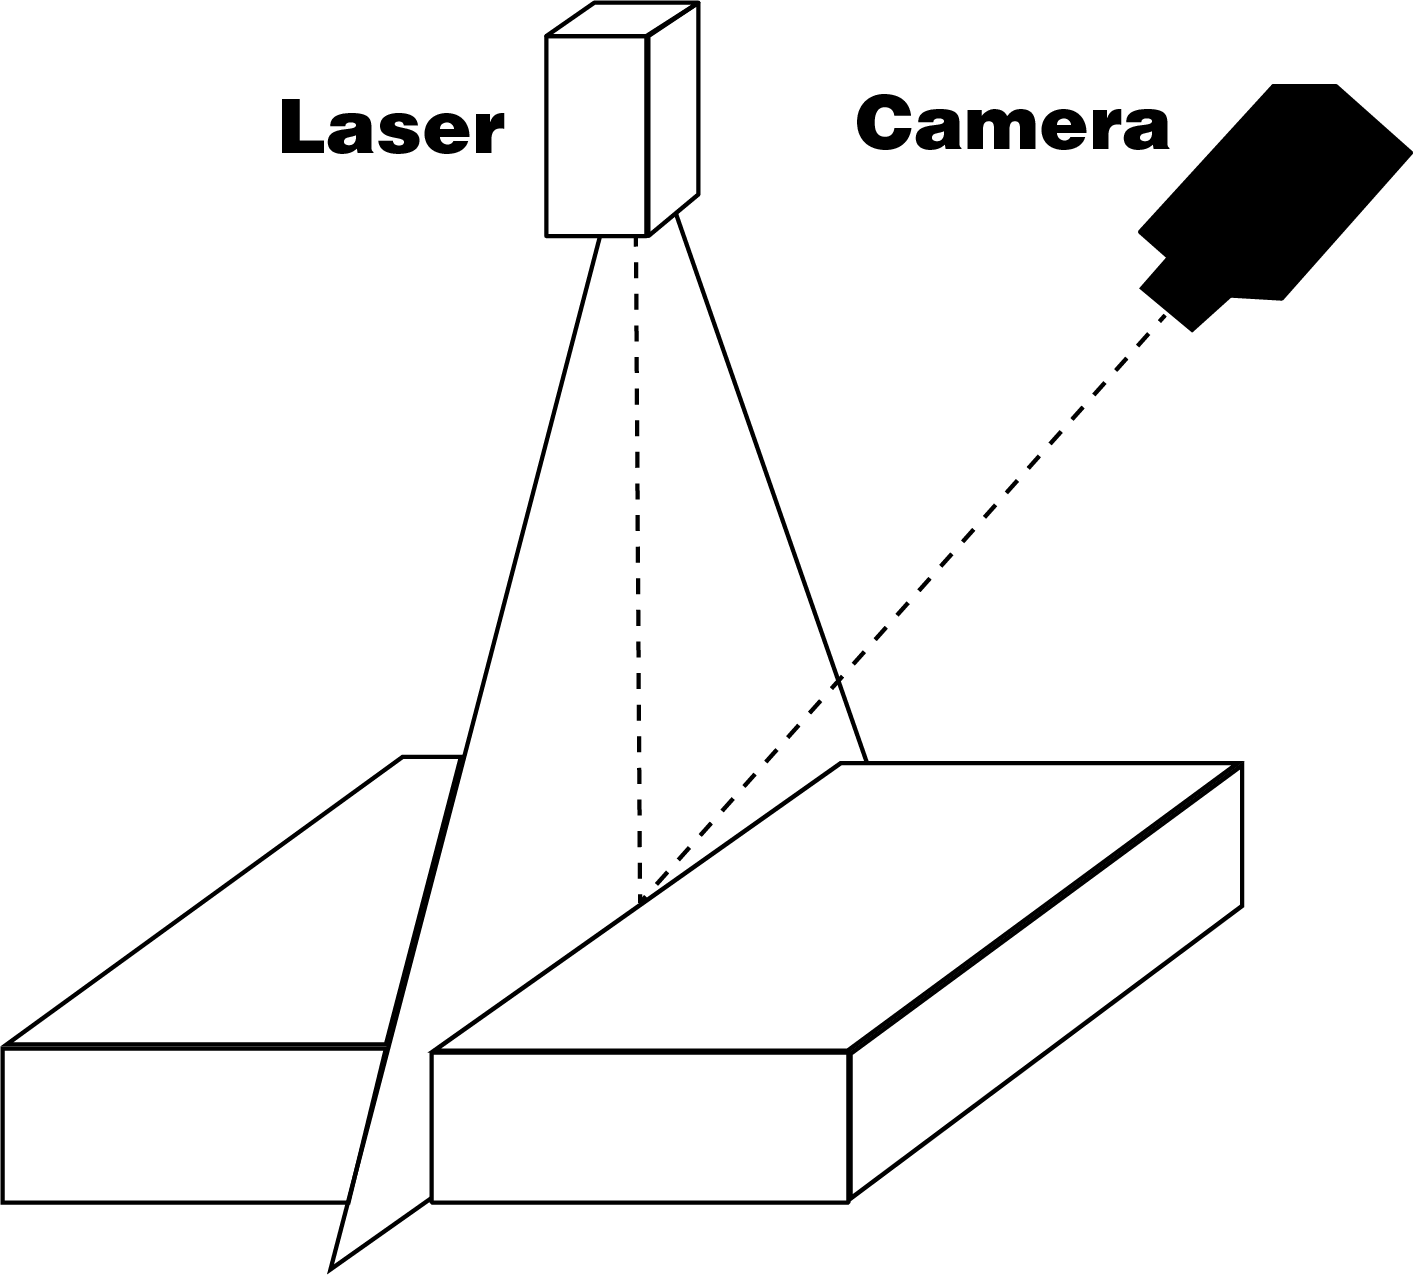
3D image capture picks up where 2D camera technology reaches its limits, particularly with regard to the depth of field of the images and the ability to recognize differences in height. To create a height profile, the component is illuminated with a line laser. The laser beam is reflected and captured by a camera. The illumination of the line laser generates many sectional images. This partial information of the component is put together by the software to form an overall object.
The following features can be checked using 3D camera technology:


2D camera technology
2D image capture is based on the principle of the human eye – light falls on an object, is reflected and captured by the eye. In our systems, artificial lighting is used to generate light beams that are reflected by the object and captured by the camera. The choice of suitable lighting and camera depends on the application.
The following features can be checked using 2D camera technology:
Decision
The components are classified based on the set inspection parameters. The data can be stored and analyzed via an SQL database or transmitted to a higher-level system.
Image analysis
The image analysis is performed by algorithms that process the data generated by the image acquisition. These algorithms are integrated into the operating software, which is used to control the system and define and save the inspection criteria.
Image acquisition
Image acquisition includes the selection of lighting and camera technology. The type and sensitivity of the components are determined according to the previously defined test characteristics and tolerances.
Handling
The variety of components and the desired degree of automation make component handling crucial. Transport and precise positioning under the inspection tool are crucial for optimum inspection results.
Inspection
The same requirements apply for an optical inspection as for the human eye. It is important to describe the component, define the characteristics to be tested and specify the tolerances.
You are currently viewing a placeholder content from Vimeo. To access the actual content, click the button below. Please note that doing so will share data with third-party providers.
More InformationYou are currently viewing a placeholder content from YouTube. To access the actual content, click the button below. Please note that doing so will share data with third-party providers.
More InformationYou need to load content from reCAPTCHA to submit the form. Please note that doing so will share data with third-party providers.
More Information